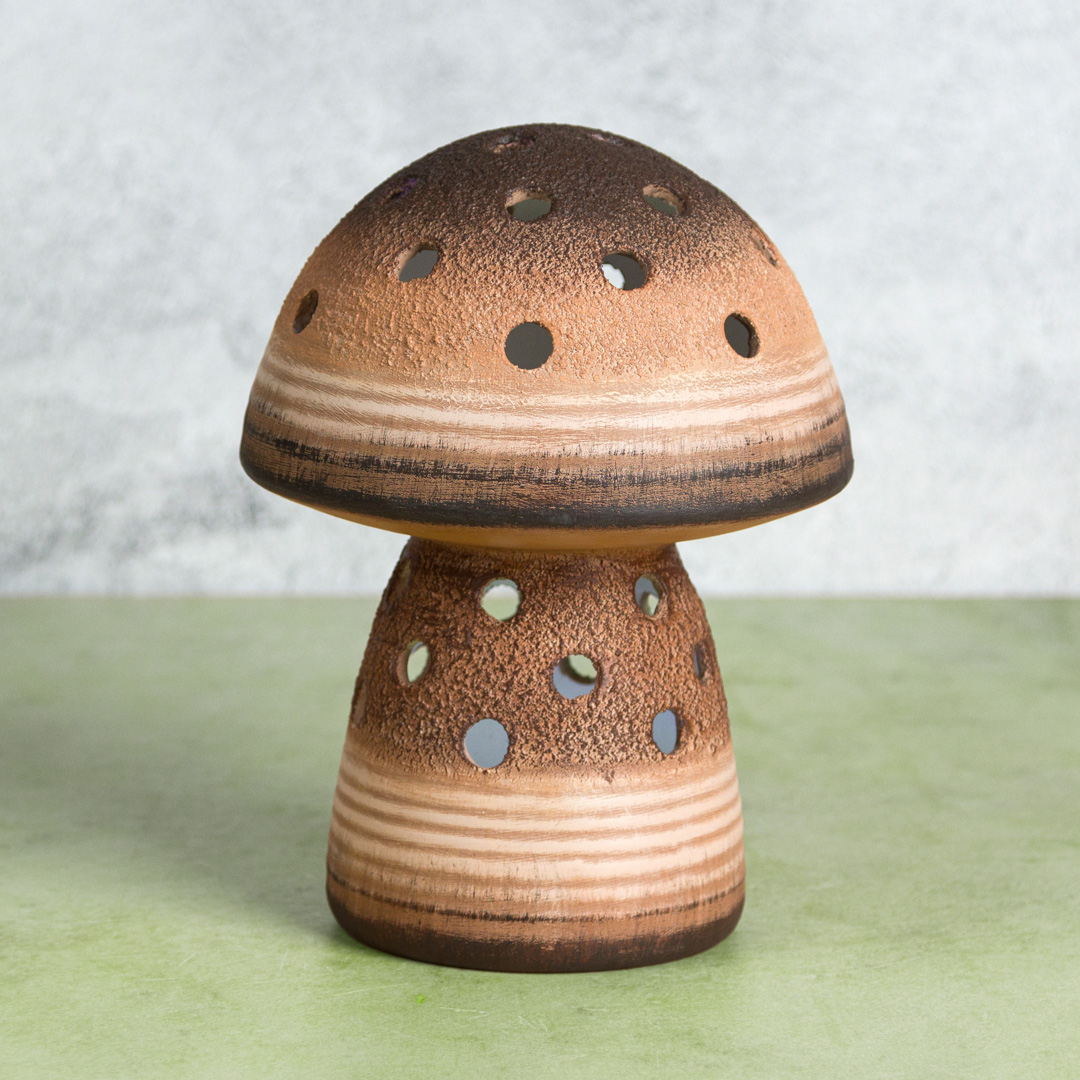
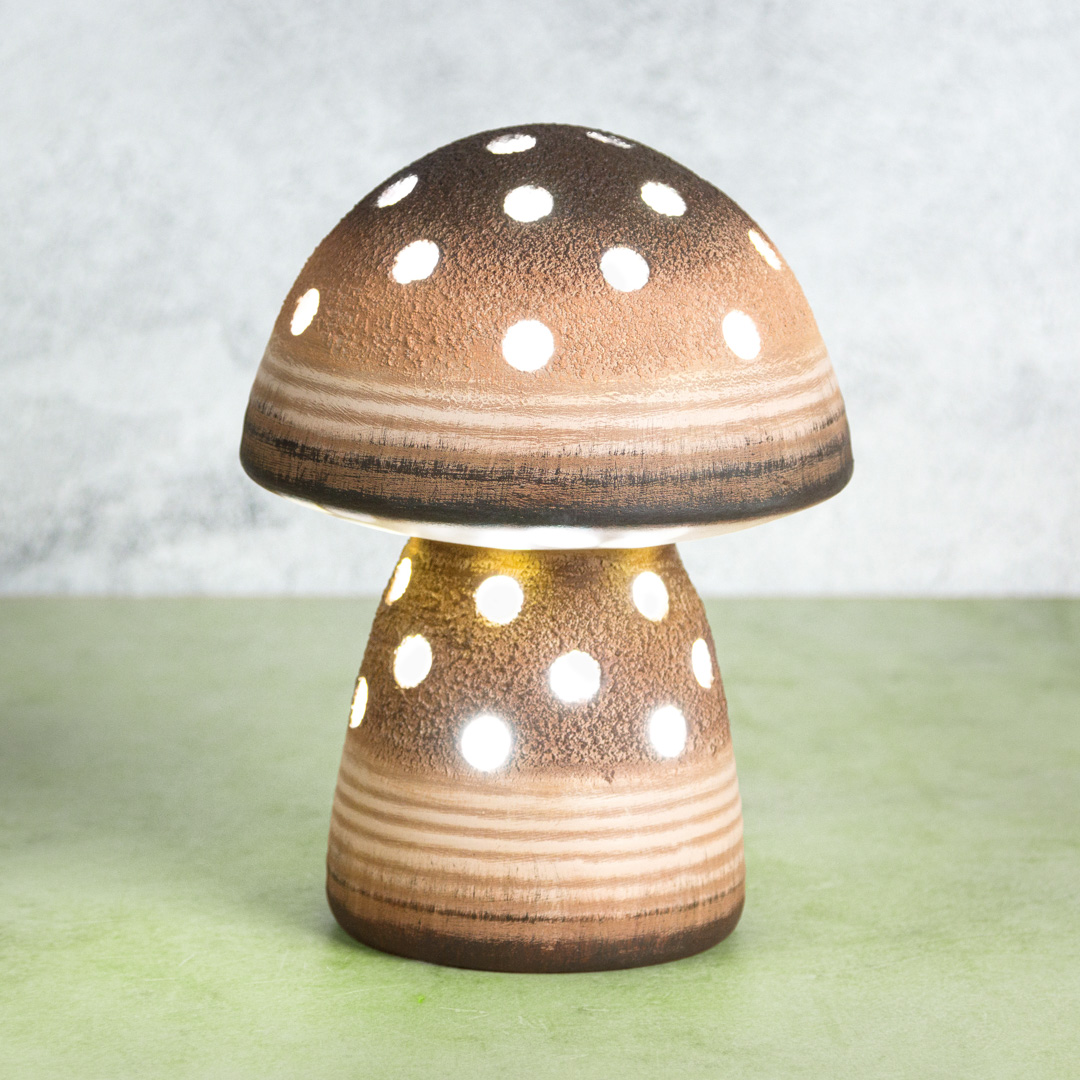
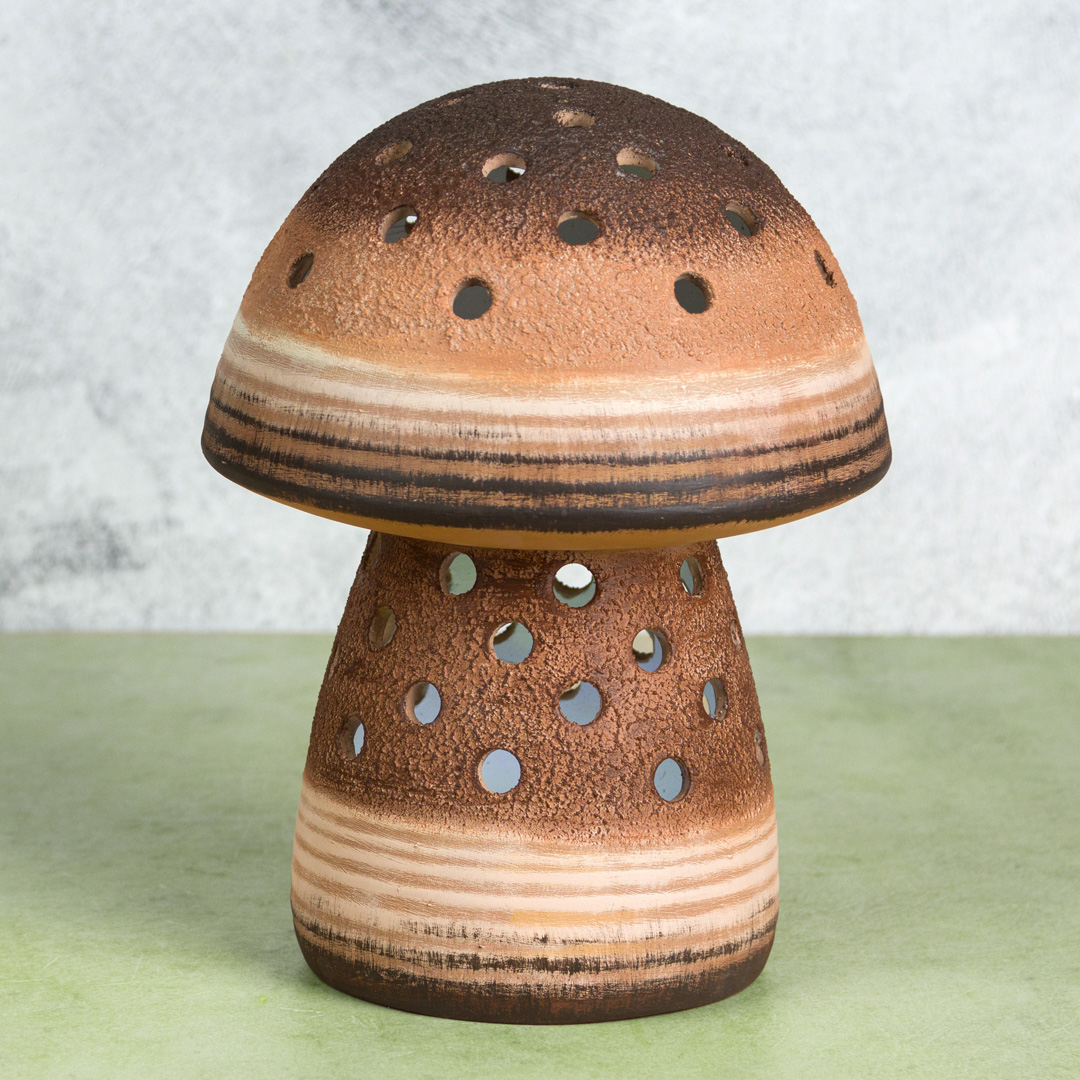
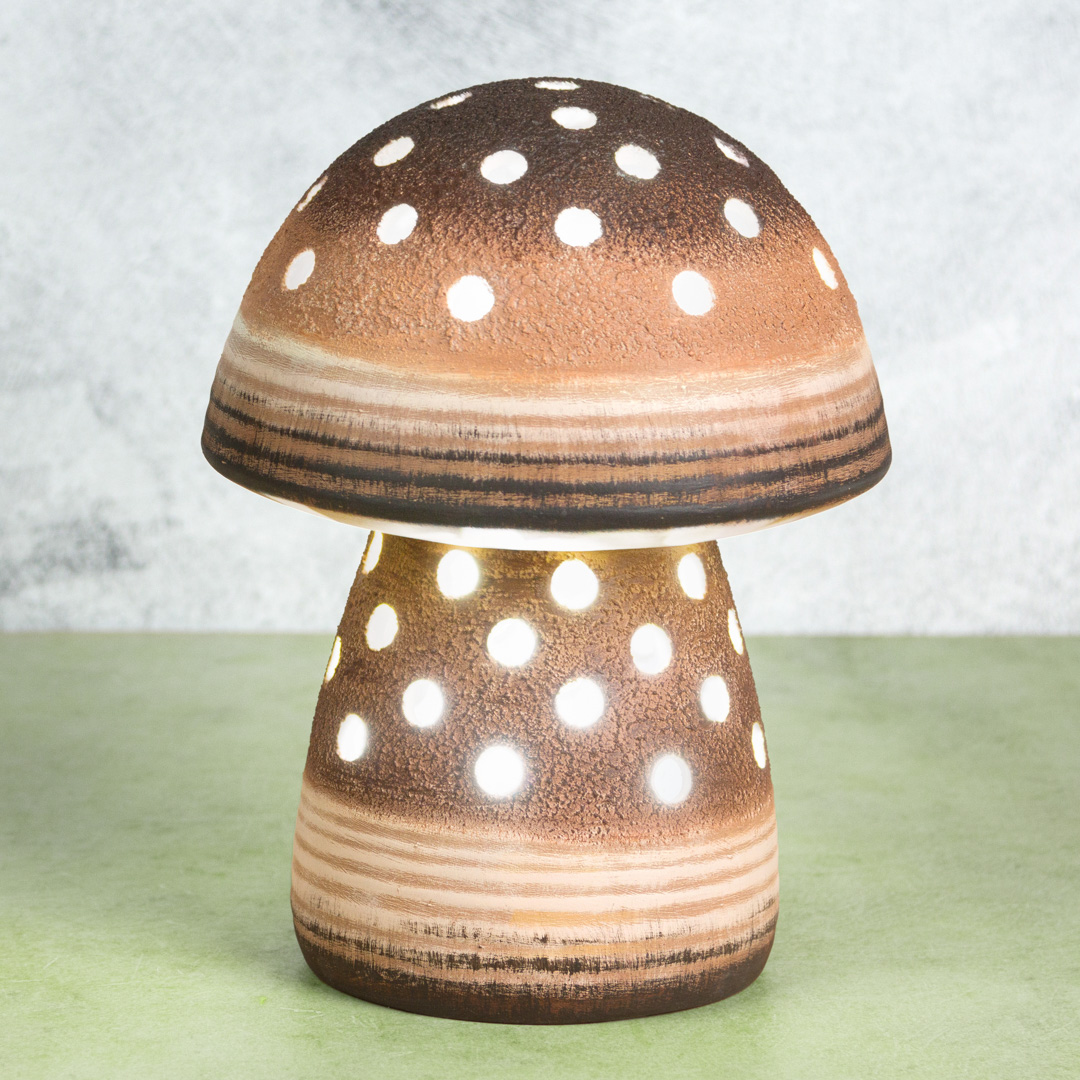
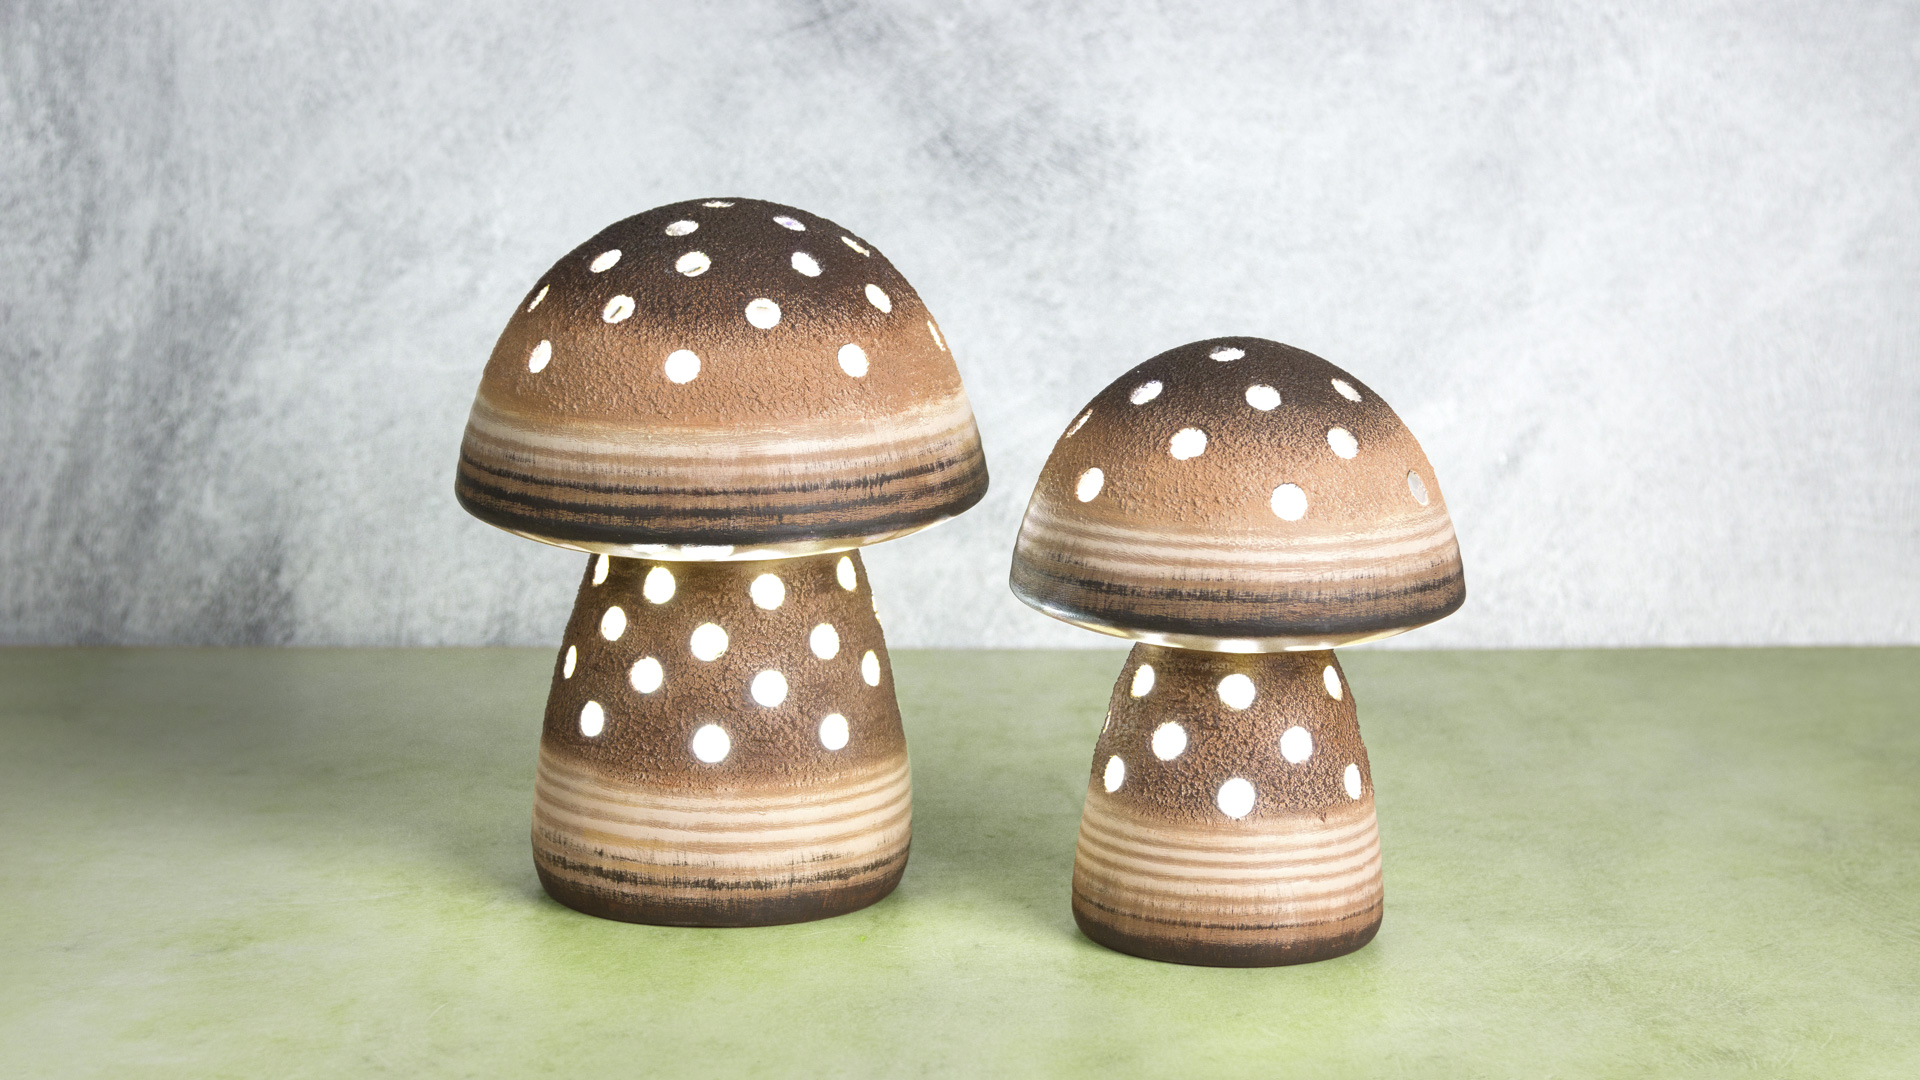
Large and Small Mushroom Lanterns In Bisque Stains

Designer: Bob Moreni

Share

Instructions

  1. Begin with properly fired shelf cone 04 bisque. Moisten a clean sponge and wipe bisque to remove any dust.  
  2. Using a AB710 ¾” Flat Shader, base coat both Mushroom Lanterns with OS467 Light Brown.  Allow to dry.
  3. In a small cup mix about 2 ounces of AS964 No-Fire Snow with some each of OS467 Light Bron and some OS472 Walnut. This will create the look of the OS467 Light Brown since the No-Fire Snow will lighten the color. 
  4. Using a BT910 Synthetic Sponge, sponge a coat of this mix to each of the mushrooms creating stucco type texture. Try to keep the texture even. Apply only to the top of the mushrooms above the ribbed area and to the plain area of the mushroom stems. Allow to dry. 
  5. Using a DB803 #8 Round, drybrush the lower texture areas of the mushrooms with OS531 Rosy Tan and the upper areas of the texture with OS493 Sandalwood blending the two colors in the middle. Highlight the top and the top of the stem area with OS472 Walnut. 
  6. Using a DB805 #3 Fan, drybrush the ribbed area of the mushroom top and the stem with OS441 Cargo Pants. Then drybrush the edge of the top and the bottom edge of the stem with OS473 Black Brown. Allow to dry! 
  7. Using a AB710 ¾” Flat Shader, apply 2 light coats of AC502 Mat Sealer to both Mushrooms, Allow to dry between each coat. 
  8. DO NOT Fire! 

Supplies

Form

  • MB1643 Large Mushroom Lantern
  • MB1644 Small Mushroom Lantern

Colors

  • AS964 No-Fire Snow 
  • AC502 Matte Sealer 
  • OS441 Cargo Pants 
  • OS467 Light Brown 
  • OS472 Walnut 
  • OS473 Black Brown 
  • OS493 Sandalwood 
  • OS531 Rosy Tan 

Decorating Accessories

  • AB710 ¾” Flat Shader 
  • DB803 #8 Round 
  • DB805 #3 Fan 

Miscellaneous Accessories

  • Sponge 
  • Water Bowl 
  • Paper Towels 
  • Pencil 
  • Glazed tile or paper plates for a Palette  
  • Popsicle Stix  
  • Small Cup
Top