Winter Church Cutout Bucket

Designer: William Pulse

Share

Instructions

  1. Cut out the pattern around the edge for ease of transfer. Center and transfer the pattern onto the damp Leather Hard greenware using a Ball Point Pen over the pattern. You want to press hard enough to transfer the pattern on to the wet greenware but not deform the piece.
  2. Place the ware onto a Banding Wheel for ease of working on the piece. When cutting out the fret work, always try to cut towards solid areas when possible. Use either a Scapple or Fret Tool to cut the design out. A Clean Up Tool has too large of a blade to do the intricate detail. Start with the finer cutout areas in the trees and windows of the church, then move onto the middle areas and work out to the outer edges of the pattern. Take your time and try to cut into the ware at a right angle to the ware. Let the piece dry.
  3. Using a Clean Up Tool to remove the seam lines in a diagonal motion. Use the Green Grit Cloth to refine and remove any flaws in the ware. Be care when using the Grit Cloth around the cutout areas as they are delicate and easily broken. Use CB-802 Round Brush dipped in water to clean out any of the finer cutouts in the pattern. Be care not to over wet any of these areas when cleaning the design. Gently remove any sharp edges inside of the design area. Let Dry.
  4. Wipe down the piece with a moistened Synthetic Sponge being careful over the cutout areas. Make sure no debris is in the inside of the piece.
  5. Fire the piece to Shelf Cone 04.
  6. Wipe out the inside of the ware with a moistened Synthetic Sponge to remove any dust and debris. Be careful when doing this to not break off any of the design.
  7. Using CB-604 Soft Fan to apply 3 coats of SP-212 Speckled Moody Blue to the inside of the piece. Be careful applying the color to where it doesn’t come through any of the cutout areas in the pattern. Use water and CB-802 Round to remove any glaze that may have come through onto the front of the pattern or cutout areas. Make sure no blue is left on the outside of the ware. Let Dry.
  8. Use CB-602 Soft Fan and CB-604 Soft Fan to apply 3-4 smooth even coats of S-301 Marshmallow White to the outside of the ware excluding the top rim and flange, bottom trim and bottom and the handle knobs. The smaller fan brush will help you get into the finer cutout areas of the pattern.
  9. Use CB-404 Pointed Round or CB-604 Soft Fan to apply 2-3 Coats of S-2101 Crystal Clear Brushing to the unpainted top flange and trim and bottom trim, bottom of can and to the handle knobs. Let dry.
  10. Stilt and Fire the piece to Shelf Cone 05-06.
  11. Use Denatured Alcohol and a lint free cloth to clean the ware before applying Fired White Gold Luster. Let dry. Use OB-916W #6 Filbert to apply 1 even coat of OG-802 White Gold to top trim and flange, bottom trim (not the actual bottom of ware) and to the handle knobs. Let dry. Clean the brush with OG-901 Essence designated for the White Gold (Silver) only.
  12. Stilt and Fire the ware to Shelf Cone 018

Supplies

Form

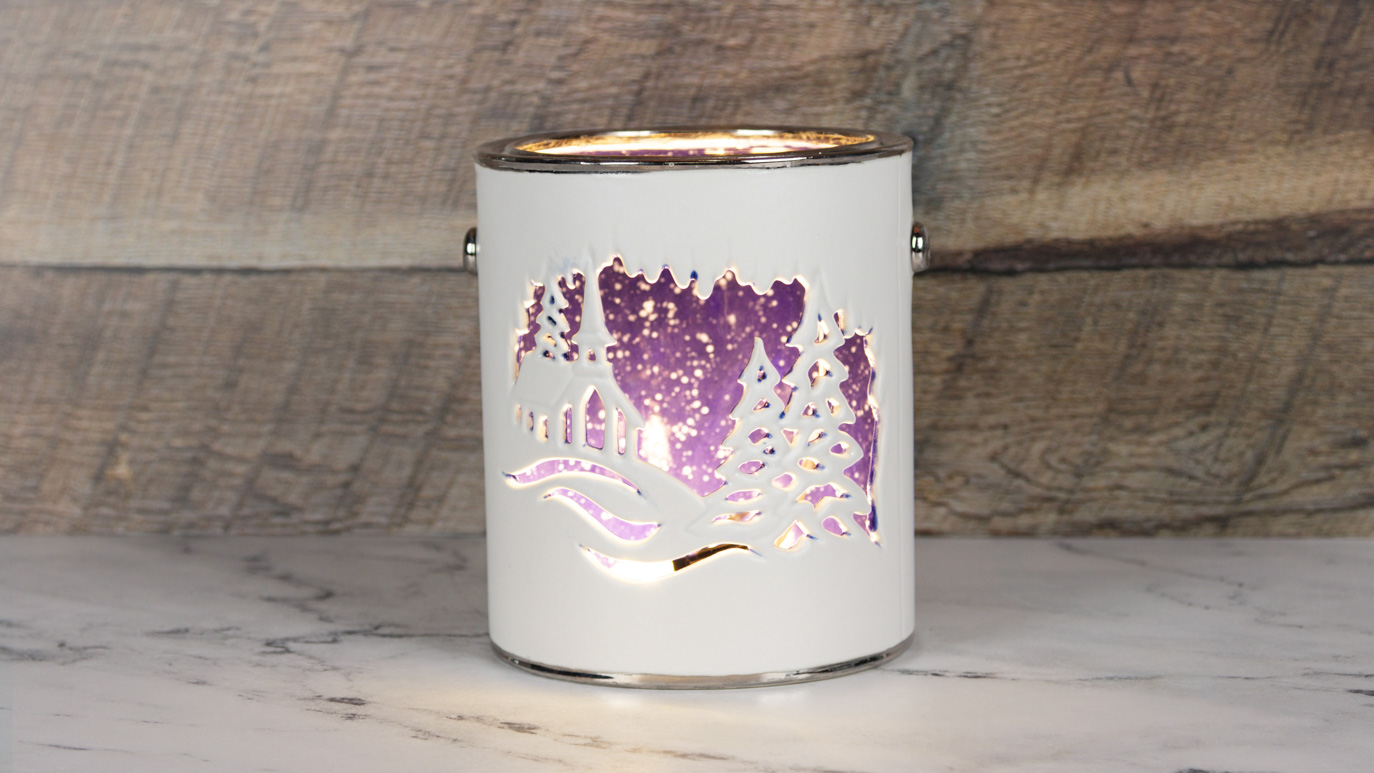
  • CD1404 Gallon Paint Can (Leather Hard (wet) Greenware)

Colors

  • FN-301 Marshmallow White
  • S-2101 Crystal Clear Brushing
  • SP-212 Speckled Moody Blue
  • OG802 White Gold
  • OA-901 Essence

Decorating Accessories

  • CB-602 Soft Fan
  • CB-604 Soft Fan
  • OB-916W #6 Filbert Silver Brush
  • DB-802 Round

Miscellaneous Accessories

  • Ball Point Pen
  • Clean Up Tool
  • Scalpel or Fret Tool
  • Green Grit Cloth
  • Synthetic Sponge
  • Banding Wheel
  • Denatured Alcohol (90% alcohol if possible)
  • Pattern
Top