Begin with about 3# of wedged clay and rolling out a slab about ¼” thick.
Either pull the handles or roll coils for the handles and shape on the table to set up a bit.
Make the base of the mug by cutting out a circle from the slab for a flat bottom or pinching a small bowl to make a lifted bottom (if you have access to wheels this is also an option to make the lifted bottom, but be sure to account for drying time if using this method).
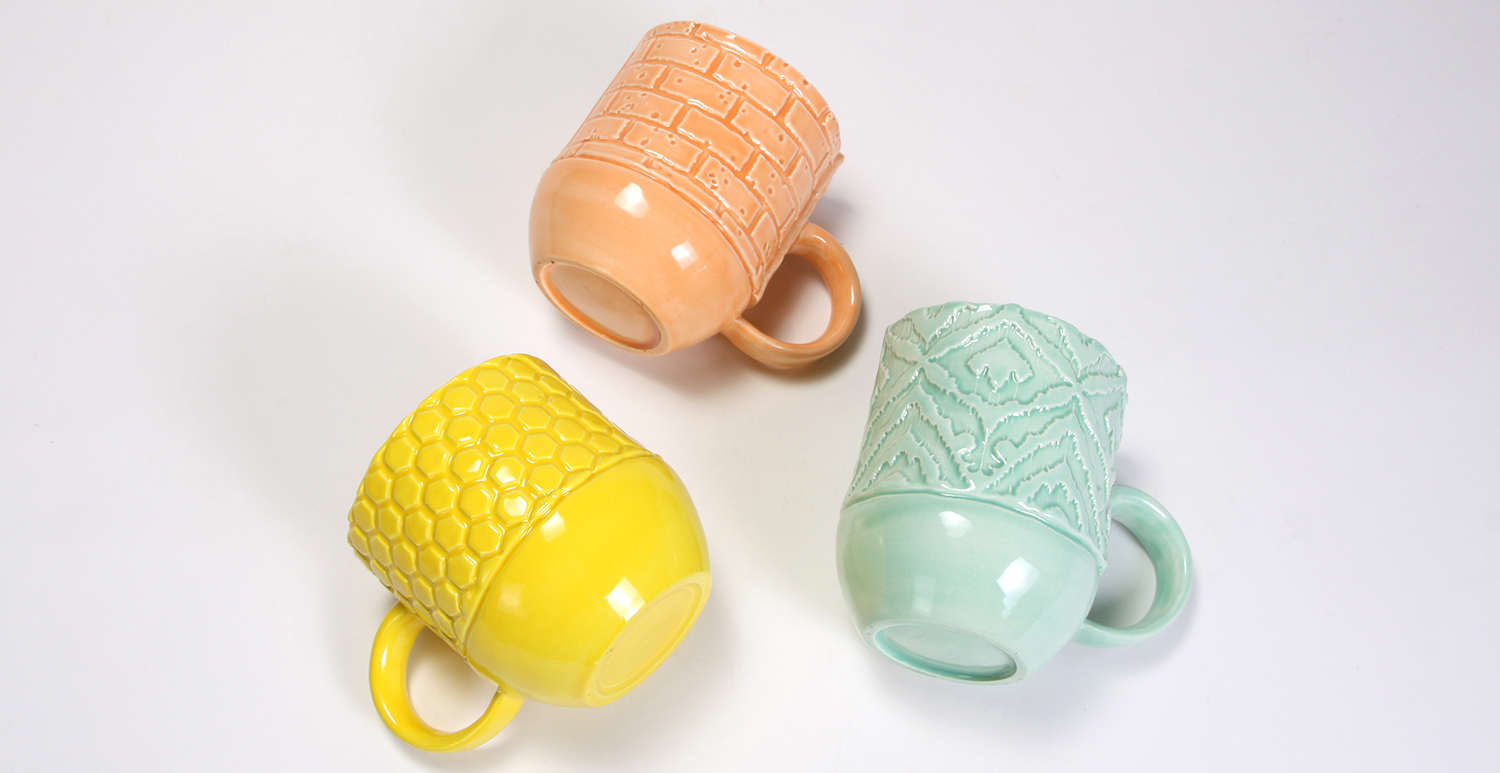
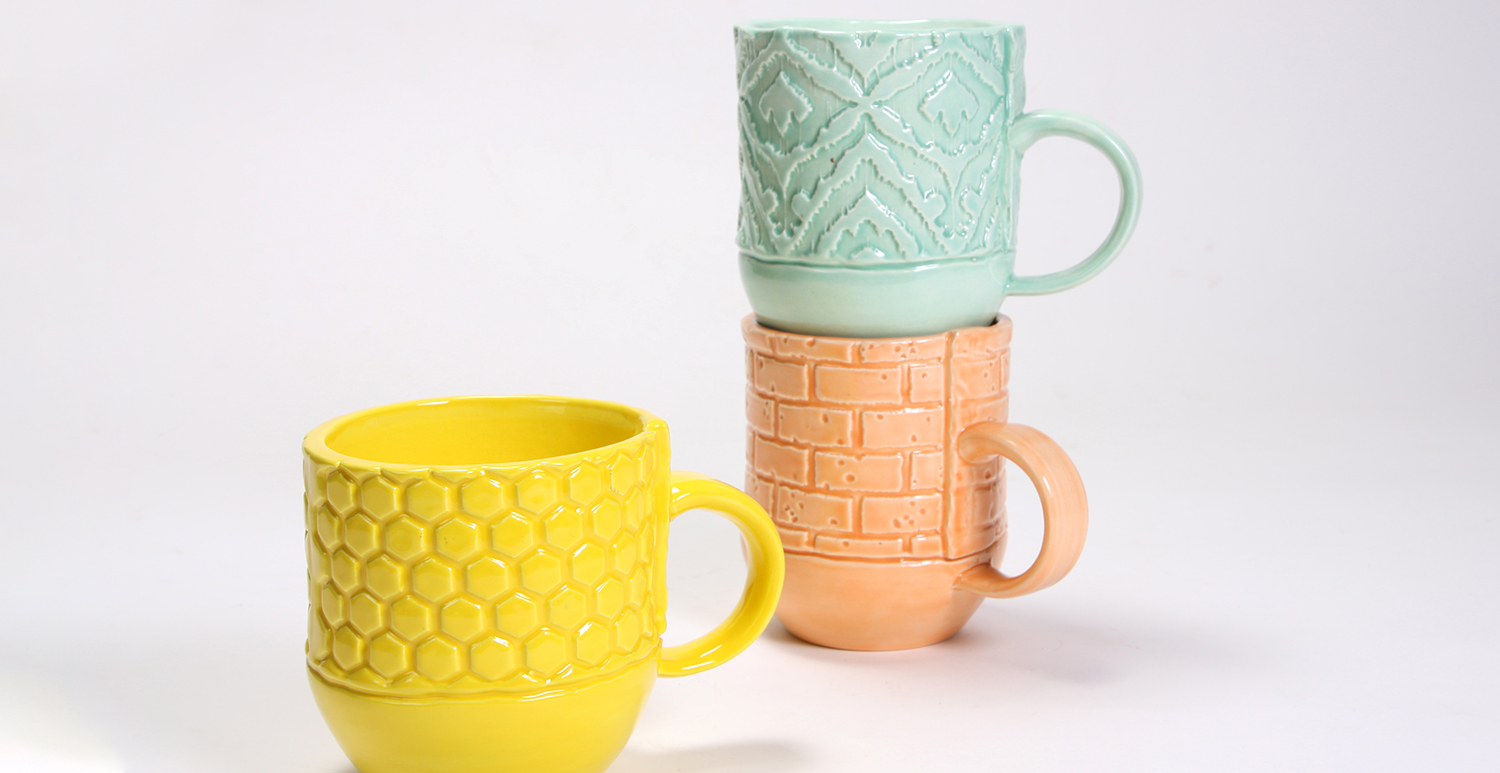
Place a mat of your choice onto the slab and gently press down with your hand from the center outward. Once the mat is secure, use a rolling pin to fully and evenly press it into the slab. Gently remove the mat.
Use a straight edge to cut about a 4” tall band. Depending on the size of your base it will need to be about 6”-10” long. We would recommend leaving it kind of long and precisely measuring it in the next step.
Place your slab vertically on top of your base and wrap it around so it is forming the top of the mug. Cut off any excess length from the slab, but be sure to leave about ¼”-1/2” overlap for slipping and scoring.
Lay the slab back on the table and score the inside of one edge and the outside of the other, as well as the bottom edge of the slab. Set slab up vertically and attach both ends with water or slip. Be sure to pinch firmly with your finger.
Score the top edge of your base, add water and align the top cylinder, firmly pressing down to ensure a strong connection.
Attach handle to the mug by slipping and scoring both the attachment points of the handle and where they attach to the piece. Firmly press the handle into the piece; you may need to provide support from the inside to avoid any warping.
Clean up your seams and edges.
Loosely cover with plastic and allow to dry slowly before bisque firing.
Fire to cone 04.
Using the Soft Fan, apply 3 coats of FN-002 Yellow, FN-207 Orange Slice, or FN-216 Sea Glass to the corresponding mug. Allow glaze to dry between coats.