Roll clay flat into a slab that is 3/8 of an inch thick.
Choose an oval size for the body of the snail. Make 2 paper stencils of the oval you chose.
Place the stencils on the slab and cut both ovals with a needle tool.
Add texture by rolling XAR09 Xiem NamiWaves Art Roller over both ovals.
Take a CD777 Oval Slump & Hump mold and slump one of your textured ovals into the mold. Make sure the texture is facing down into the mold. Let this sit for 15-30 mins and then repeat with other oval.
Roll another slab and cut 3 long strips out of the slab that are 2-3 inches wide and long enough to go all the way around your slumped ovals.
Attach one of the strips to one of the ovals and then attached the remanding oval to the other end of the strip. This will be the snails shell. Make sure you cut a small hole into the underside of the shell to keep it from blowing up in the kiln.
With the other 2 long slabs, create the snail’s body. Attach the 1 slab to the underside of the snail. Leave a few inches in the back for the tail and the rest is for the head of the snail. Make sure you don’t close up the air vent that you created on the snail’s shell.
Cut the end of the snail’s tail to a point.
Take the other end of the slab and attach it to the shell to keep the head of the snail up.
You have one half of the head of the snail done, but you need to use the 3rd for the other half of the head. You are creating a tube by attaching one part of the slab to the other.
Close up the top of the tube and this will be the top of the snail’s head.
Roll small coils and attach to the top of the head for the eyes.
Let snail get to bone dry and fire to cone 04 to bisque.
Glazing:
Begin with properly fired shelf cone 04 bisque. Moisten a clean sponge and wipe bisque to remove any dust.
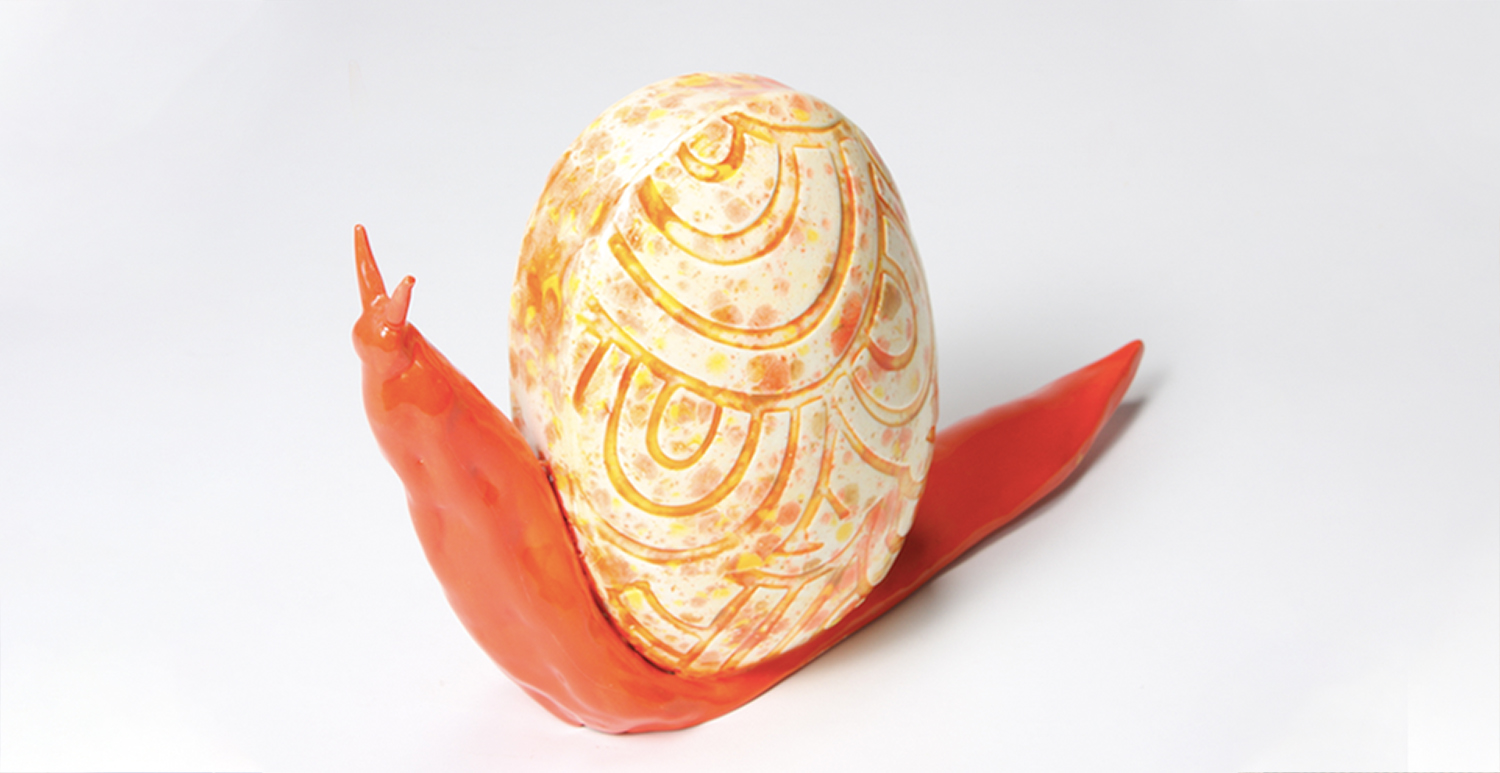
Using CB-604 #4 Soft Fan brush apply 1 heavy coat of SC-97 Cant-elope to the textured part of the shell.
Once that is dry take a damp BT-910 Synthetic Sponge and wipe away the SC-97 Cant-elope, leaving glaze in the texture part of the shell.
When that is all dry apply 3 coats of CG-966 Tiger Lily to the shell of the snail. CG-966 Tiger Lily is a translucent crystal glaze so the Cant-elope will show through the Tiger Lily.
The body of the snail gets 3 coats of SC-88 Tu Tu Tango with a soft fan brush.
While the third coat of SC-88 Tu Tu Tango is drying, float a coat of SC-97 Cant-elope around the shell. Blend the 2 colors together.